1. Find "Accounts"
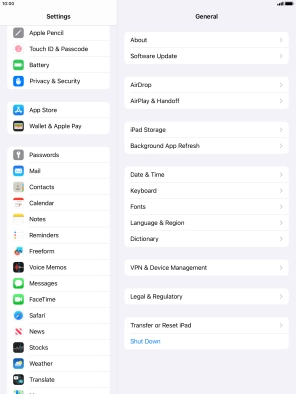
Press Settings.
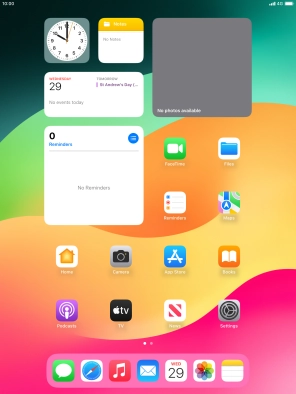
![](http://wmstatic.global.ssl.fastly.net/ml/7020124-f-16707c26-9a5e-41cb-a603-7d0d6a670293.png?width=296&height=396)
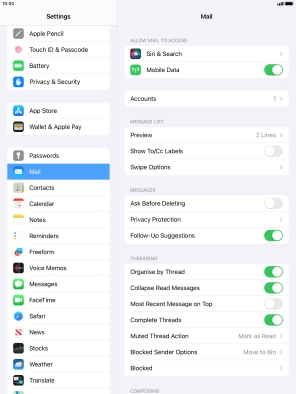
Press Mail.
![](http://wmstatic.global.ssl.fastly.net/ml/7020124-f-721f2c05-0628-4dcb-966f-1b50408018d7.png?width=296&height=396)
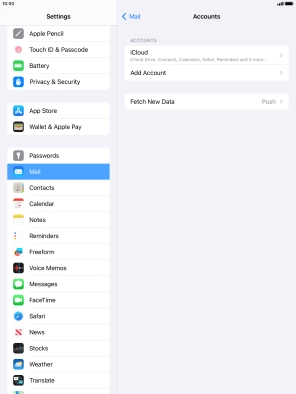
Press Accounts.
![](http://wmstatic.global.ssl.fastly.net/ml/7020124-f-e977136d-533c-4dc0-809d-7b91007369da.png?width=296&height=396)
2. Create new email account
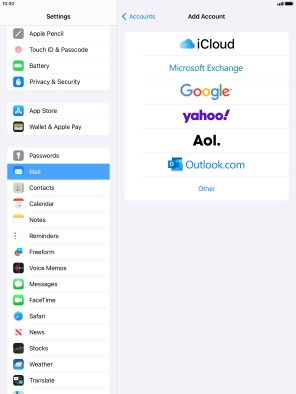
Press Add Account.
![](http://wmstatic.global.ssl.fastly.net/ml/7020124-f-4eb0666f-7b5d-4453-8f27-3b3d14681067.png?width=296&height=396)
Press Microsoft Exchange.
![](http://wmstatic.global.ssl.fastly.net/ml/7020124-f-d0005ffb-4c91-452b-afa2-60c6fd88ef1b.png?width=296&height=396)
3. Enter email address
Press Email and key in your email address.
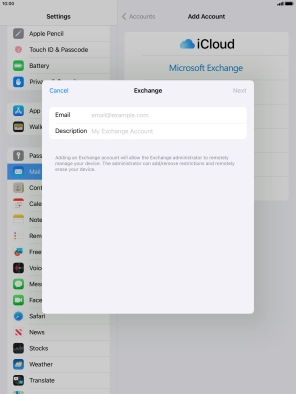
![](http://wmstatic.global.ssl.fastly.net/ml/7020124-f-650ffa34-067a-4f1f-b31a-a80c96ca31d9.png?width=296&height=396)
4. Enter email account name
Press Description and key in the required name.
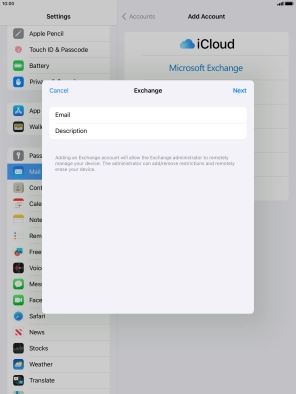
![](http://wmstatic.global.ssl.fastly.net/ml/7020124-f-629cc759-f8bf-43a2-9bd9-4af5e5195cb3.png?width=296&height=396)
Press Next.
![](http://wmstatic.global.ssl.fastly.net/ml/7020124-f-629cc759-f8bf-43a2-9bd9-4af5e5195cb3.png?width=296&height=396)
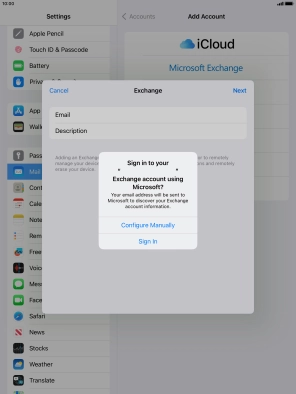
Press Sign In.
![](http://wmstatic.global.ssl.fastly.net/ml/7020124-f-ce610301-3e83-4cbb-b561-419b2422c570.png?width=296&height=396)
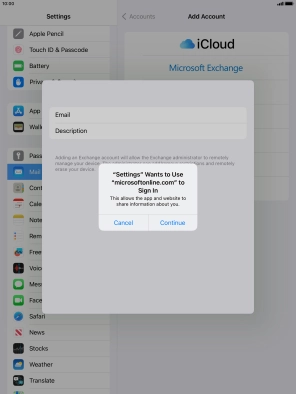
Press Continue.
![](http://wmstatic.global.ssl.fastly.net/ml/7020124-f-1373fb24-b71f-46ec-ba9f-1f36fe66b64d.png?width=296&height=396)
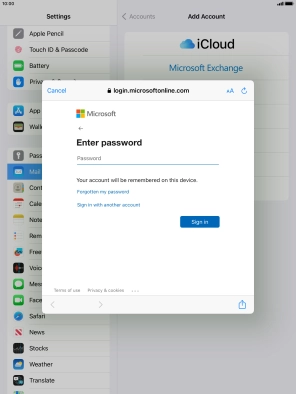
5. Enter password
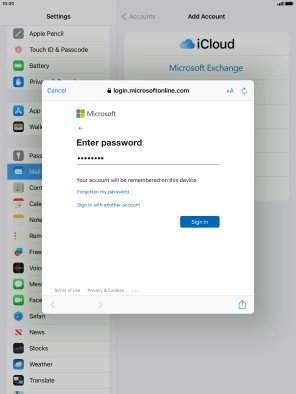
Press Password and key in the password for your email account.
![](http://wmstatic.global.ssl.fastly.net/ml/7020124-f-f1ab5054-acf2-475c-b5e8-9fb0e8b35488.png?width=296&height=396)
Press Sign in.
![](http://wmstatic.global.ssl.fastly.net/ml/7020124-f-f511cd4b-41b2-416f-aa3c-015c9e4173d8.png?width=296&height=396)
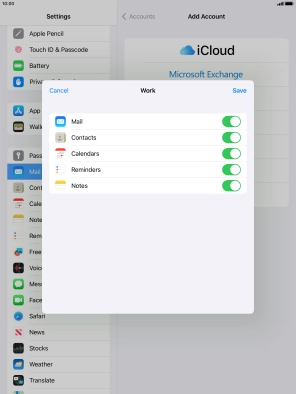
6. Select settings for synchronisation of data
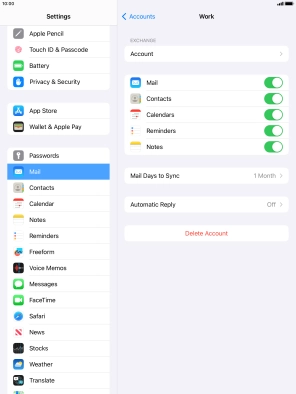
Press the indicators next to the required data types to turn synchronisation of each data type on or off.
![](http://wmstatic.global.ssl.fastly.net/ml/7020124-f-a72f2c00-24b1-4353-82f1-ffa7f05f9926.png?width=296&height=396)
Press Save. Your email account has now been set up. To select more settings for e.g. SSL encryption and retrieval of new email messages, proceed with the following steps.
![](http://wmstatic.global.ssl.fastly.net/ml/7020124-f-a72f2c00-24b1-4353-82f1-ffa7f05f9926.png?width=296&height=396)
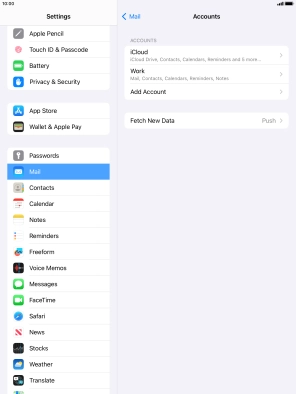
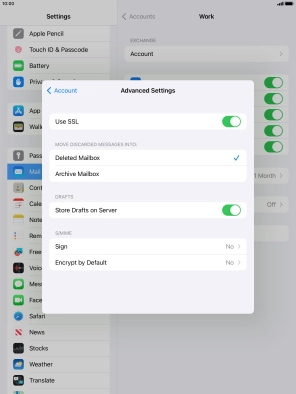
7. Turn SSL encryption on or off
Press the name of the Exchange email account you've just set up.
![](http://wmstatic.global.ssl.fastly.net/ml/7020124-f-b217d8ee-df99-4700-a76b-807089de7bff.png?width=296&height=396)
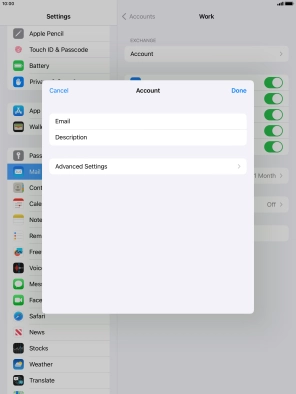
Press Account.
![](http://wmstatic.global.ssl.fastly.net/ml/7020124-f-3274342b-91c5-4f5f-aafe-5c55bc975884.png?width=296&height=396)
Press Advanced Settings.
![](http://wmstatic.global.ssl.fastly.net/ml/7020124-f-e9b14b99-c5d9-494f-9d43-5e97b37e859f.png?width=296&height=396)
Press the indicator next to "Use SSL" to turn the function on or off.
![](http://wmstatic.global.ssl.fastly.net/ml/7020124-f-caaa0307-bf12-411e-a756-70d6811f600b.png?width=296&height=396)
Press arrow left.
![](http://wmstatic.global.ssl.fastly.net/ml/7020124-f-caaa0307-bf12-411e-a756-70d6811f600b.png?width=296&height=396)
Press Done.
![](http://wmstatic.global.ssl.fastly.net/ml/7020124-f-e9b14b99-c5d9-494f-9d43-5e97b37e859f.png?width=296&height=396)
Press arrow left.
![](http://wmstatic.global.ssl.fastly.net/ml/7020124-f-3274342b-91c5-4f5f-aafe-5c55bc975884.png?width=296&height=396)
8. Select setting for retrieval of new email messages
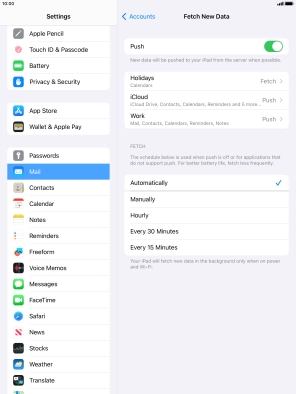
Press Fetch New Data.
![](http://wmstatic.global.ssl.fastly.net/ml/7020124-f-b217d8ee-df99-4700-a76b-807089de7bff.png?width=296&height=396)
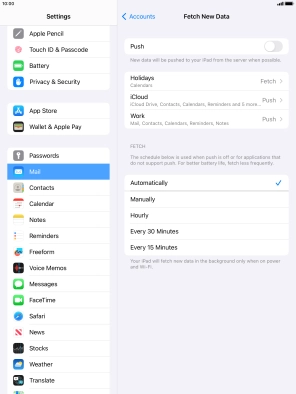
Press the indicator next to "Push" to turn the function on or off.
![](http://wmstatic.global.ssl.fastly.net/ml/7020124-f-2c2b5cdd-0570-4b8f-8500-361af89f8407.png?width=296&height=396)
If you turn off the function, press the required setting.
![](http://wmstatic.global.ssl.fastly.net/ml/7020124-f-ec9ce8b0-1e8c-45ce-b346-b519663d4a14.png?width=296&height=396)
Press the required email account and follow the instructions on the screen to select settings for the specific account.
![](http://wmstatic.global.ssl.fastly.net/ml/7020124-f-ec9ce8b0-1e8c-45ce-b346-b519663d4a14.png?width=296&height=396)
9. Return to the home screen
Press the Home key to return to the home screen.
![](http://wmstatic.global.ssl.fastly.net/ml/7020124-f-ec9ce8b0-1e8c-45ce-b346-b519663d4a14.png?width=296&height=396)